Friday, July 27, 2007
Generic XNA - 3D PointSprite Particles
The initial notion for this came from this site here where the author gives a basic example of a particle system. The particle shader used in this example is in fact from the very example posted there. I have tried to visit this link at the time of writing this post and it looks like the site is under development.
As you can see in the example this particle system can manage up to 10K of particles without dropping the FPS below 60 which I think is quite good as my previous attempts, first using a textured quad (you can see this if you take a look at my RCSnow class in the Randomchaos3DEngine source) gave poor performance at around 1.5K particles and another system I wrote using a single draw with a vertex array was pretty efficient at low particle counts like 2 or 3K but 10K gave a big drop. You also have to keep in mind that the screen shots were taken on a crappy old laptop that does not have the resources to do any real 3D, I will have to run it on my desk top and see what FPS I get then...
In this example there is also a FPS class so you can calculate you FPS (Frames Per Second). Also a method of displaying text using the native XNA Refresh methods rather than Nuclex Fonts. I am also reusing the SkyBox and Camera class show in the last example.
I guess the next step will be to do ALL the particles physics on the GPU, one step at a time eh...
Controls
Mouse to rotate camera.
Arrow keys to translate camera.
Escape to exit.
F1 - F10 alter number of particles
F11 & F12 switch between particle modes.
R,G,B & C to cycle particle colours from Red,Blue,Green and Random
Any comments on this example, please post them here, especially if you are getting great FPS, be nice to know how many particles it can render and keep the FPS over 60
GenericExampleParticleSystem.zip
Thursday, July 26, 2007
Generic XNA - SkyBox
So a sky box, having done the Hazy Mind tutorial and had a play with Riemers tutorials I decided to create my own skybox. I like the way both tutorials do there sky box's but I kind of like cube maps, it means I keep 6 textures in one place, have only one texture variable and so makes my life a little easier when passing textures to my skybox. So my version of a skybox uses a box mesh (the same one from Riemers tutorial) but instead of passing a texture to each side of the box or having to pass multiple textures to the mesh I just pass a single cube map. I then wrote a shader to render the cube map on the skybox mesh.
In this example I also have a basic camera that is a static class, this does not use the GameComponents at all as I want it to be used by all drawable elements in my code, so this class is driven by the game loop directly from in my game class.
So, the code...
SkyBox Class
public class SkyBox : DrawableGameComponent
{
private Model skyboxMesh;
public Vector3 myPosition;
public Quaternion myRotation;
public Vector3 myScale;
public TextureCube environ;
Effect shader;
string modelAsset;
string shaderAsset;
string textureAsset;
ContentManager content;
public SkyBox(Game game,string modelAsset,string shaderAsset,string textureAsset) : base(game)
{
content = new ContentManager(game.Services);
this.modelAsset = modelAsset;
this.shaderAsset = shaderAsset;
this.textureAsset = textureAsset;
myPosition = new Vector3(0, 0, 0);
myRotation = new Quaternion(0, 0, 0, 1);
myScale = new Vector3(55, 55, 55);
}
protected override void LoadGraphicsContent(bool loadAllContent)
{
if (loadAllContent)
{
skyboxMesh = content.Load<Model>(modelAsset);
shader = content.Load<Effect>(shaderAsset);
environ = content.Load<TextureCube>(textureAsset);
}
base.LoadGraphicsContent(loadAllContent);
}
public override void Draw(GameTime gameTime)
{
Matrix World = Matrix.CreateScale(myScale) *
Matrix.CreateFromQuaternion(myRotation) *
Matrix.CreateTranslation(Camera.myPosition);
shader.Parameters["World"].SetValue(World);
shader.Parameters["View"].SetValue(Camera.myView);
shader.Parameters["Projection"].SetValue(Camera.myProjection);
shader.Parameters["surfaceTexture"].SetValue(environ);
shader.Parameters["EyePosition"].SetValue(Camera.myPosition);
for (int pass = 0; pass < shader.CurrentTechnique.Passes.Count; pass++)
{
for (int msh = 0; msh < skyboxMesh.Meshes.Count; msh++)
{
ModelMesh mesh = skyboxMesh.Meshes[msh];
for (int prt = 0; prt < mesh.MeshParts.Count; prt++)
mesh.MeshParts[prt].Effect = shader;
mesh.Draw();
}
}
base.Draw(gameTime);
}
}
Camera Class
public sealed class Camera
{
public static Vector3 myPosition;
public static Vector3 myTarget;
public static Quaternion myRotation;
private static Matrix myWorld;
public static Matrix myView;
public static Matrix myProjection;
public static Viewport myViewport;
private Camera()
{ }
public static void Initialize()
{
myTarget = new Vector3();
myPosition = new Vector3(0, 0, 0);
myRotation = new Quaternion(0, 0, 0, 1);
}
public static void Update()
{
myWorld = Matrix.Identity;
myView = Matrix.Invert(Matrix.CreateFromQuaternion(myRotation) *
Matrix.CreateTranslation(myPosition));
float aspectRatio = myViewport.Width / myViewport.Height;
myProjection = Matrix.CreatePerspectiveFieldOfView(1, aspectRatio, myViewport.MinDepth, myViewport.MaxDepth);
myProjection = Matrix.CreatePerspectiveFieldOfView(MathHelper.Pi / 3.0f, (float)myViewport.Width / (float)myViewport.Height, myViewport.MinDepth, myViewport.MaxDepth);
}
public static void Rotate(Vector3 axis, float angle)
{
axis = Vector3.Transform(axis, Matrix.CreateFromQuaternion(myRotation));
myRotation = Quaternion.Normalize(Quaternion.CreateFromAxisAngle(axis, angle) * myRotation);
Update();
}
public static void Translate(Vector3 distance)
{
myPosition += Vector3.Transform(distance, Matrix.CreateFromQuaternion(myRotation));
Update();
}
public static void Revolve(Vector3 target, Vector3 axis, float angle)
{
Rotate(axis, angle);
Vector3 revolveAxis = Vector3.Transform(axis, Matrix.CreateFromQuaternion(myRotation));
Quaternion rotate = Quaternion.CreateFromAxisAngle(revolveAxis, angle);
myPosition = Vector3.Transform(target - myPosition, Matrix.CreateFromQuaternion(rotate));
Update();
}
}
SkyBox Shader
//////////////////////////////////////////////////////////////
// //
// Writen by C.Humphrey //
// 26/07/2007 //
// //
// //
// Shader used to render a cube map to an inverted box //
// mesh. //
// //
//////////////////////////////////////////////////////////////
Texture surfaceTexture;
samplerCUBE TextureSampler = sampler_state
{
texture = <surfaceTexture> ;
magfilter = LINEAR;
minfilter = LINEAR;
mipfilter = LINEAR;
AddressU = Mirror;
AddressV = Mirror;
};
float4x4 World : World;
float4x4 View : View;
float4x4 Projection : Projection;
float3 EyePosition : CameraPosition;
struct VS_INPUT
{
float4 Position : POSITION0;
float3 Normal : NORMAL0;
};
struct VS_OUTPUT
{
float4 Position : POSITION0;
float3 ViewDirection : TEXCOORD2;
};
float4 CubeMapLookup(float3 CubeTexcoord)
{
return texCUBE(TextureSampler, CubeTexcoord);
}
VS_OUTPUT Transform(VS_INPUT Input)
{
float4x4 WorldViewProjection = mul(mul(World, View), Projection);
float3 ObjectPosition = mul(Input.Position, World);
VS_OUTPUT Output;
Output.Position = mul(Input.Position, WorldViewProjection);
Output.ViewDirection = EyePosition - ObjectPosition;
return Output;
}
struct PS_INPUT
{
float3 ViewDirection : TEXCOORD2;
};
float4 BasicShader(PS_INPUT Input) : COLOR0
{
float3 ViewDirection = normalize(Input.ViewDirection);
  return CubeMapLookup(-ViewDirection);
}
technique BasicShader
{
pass P0
{
VertexShader = compile vs_2_0 Transform();
PixelShader = compile ps_2_0 BasicShader();
}
}
So the sky box is instantiated like this in the Game1 constructor:
SkyBox skyBox = new SkyBox(this,"Content/Models/skybox", "Content/Shaders/skybox", "Content/Textures/cubeMap");
this.Components.Add(skyBox);
The configuration of the camera is a little more detaild. First of all, I want the user to resize the viewport, so I need to wire an event to manage this and update the cameras viewport properties, also, if the user has multiple screens and they drag the game from one window to the next, the camera viewport has to be reset again so this even also needs to be wired. So first off I write my methods to be called by the events.
/// <summary>
/// Should the user move the game screen over to another monitor.
/// </summary>
/// <param name="sender"></param>
/// <param name="e"></param>
void DeviceChanged(object sender, EventArgs e)
{
Camera.myViewport = graphics.GraphicsDevice.Viewport;
Camera.myViewport.MinDepth = 1f;
Camera.myViewport.MaxDepth = 1000f;
}
/// <summary>
/// Should the game window screen size change.
/// </summary>
/// <param name="sender"></param>
/// <param name="e"></param>
public void Resize(object sender, EventArgs e)
{
Camera.myViewport.Width = Window.ClientBounds.Width;
Camera.myViewport.Height = Window.ClientBounds.Height;
}
I now wire these events up in the Game1 constructor.
Window.ClientSizeChanged += new EventHandler(Resize);
Window.ScreenDeviceNameChanged += new EventHandler(DeviceChanged);
Now I have those bases covered I need to initialize my camera, this is done in the Initialize method of the Game1 class.
Camera.Initialize();
Camera.myViewport = graphics.GraphicsDevice.Viewport;
Camera.myViewport.MinDepth = 1f;
Camera.myViewport.MaxDepth = 1000f;
Now all I have to do is update my camera, and yes, you guessed it, this is done in the Update method of the Game2 class.
Camera.Update();
Controls
Mouse rotates camera.
Esc to exit.
Again, any comments, issues, suggestions or fixes, please comment here.
OOPS! I forgot to add the following method to the SkyBox class, basicly without it if you move the game window to another screen your app will crash as you will get memory violations. Sorry. I have not updated the zip so you will have to do this manualy, source from now on will include this method if needed.
protected override void UnloadGraphicsContent(bool unloadAllContent)
{
content.Unload();
base.UnloadGraphicsContent(unloadAllContent);
}
GenericExampleSkyBox.zip
Generic XNA
Posts titled "Generic XNA" will have code methods and elements that can be bolted into mostly any XNA project. This will include classes that inherit from GameComponent, DrawableGamesComponent so they can just be added to the games component collection if you want to or just instantiate them and call there Draw and Update methods as you see fit.
Tuesday, July 24, 2007
Source Example 6 - Fog SM 1.1 to 2
This example shows the use of shader model 1.1 - 2 methodology for fog by using the render states.
Controls
Mouse to rotate camera.
Arrow Keys to translate camera.
F1 Switch Fog On.
F2 Switch Fog Off.
RC3DEFogSample1.zip
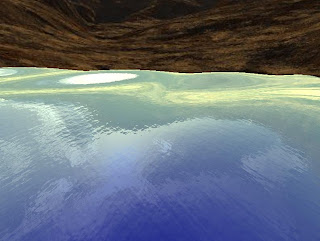
Source Example 5 - Ocean
Simply an example using the Ocean shader and class.
Controls
Mose to rotate the camera.
Arrow Keys to translate the camers.
F1 - F12 to alter Ocean paramters.
Escape to exit.
RC3DEOceanExample1.zip
Source Example 4 - Terrain
So onto terrain, this example uses a height map 128X128 and is configured to use Riemers origional terrain shader (modified for the engine). Also included in this example are my terrain shaders along with the modified bump maped versions of these shaders and the associated textures.
It also gives an example of the terrain picking and collision, again this is quite basic.
Controls
Mouse to rotate the camera.
Arrow keys to translate the camera.
Right click to drop the terrains height and left to raise it.
Keys 1-4 select a terrain shader
Escape to exit.
RC3DETerrainExample1.zip
Monday, July 23, 2007
Source Example 3 - Mesh Animation
Still showing the use of the model class, in this example we have an animated mesh (X format). Again this is another simple example using the RandomchaosContentPipelineManager to load the mesh's animation data and using the shader to animate the mesh. Both the context methods and the shader I found before MS released their mesh animation sample.
I have had to put a sleep in there as the animation plays a little fast without anything else going through the processors to slow it down, it look a little odd as the mesh only has the skybox as background and so no point of reference but it is animation and you have the source now so you can do what you like with it :)
I found the source for this animation code here Thanks DT
RC3DEModelExample3.zip
Source Example 2 - Scene Picking & Targets
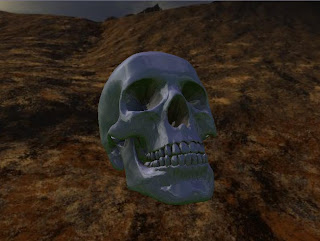
Moving on from example 1 but sticking with the Model and Scene class, this example shows how to apply picking objects from the scene and also how to apply a targeting reticle to a model using the Get2DCoors method.
For this to be done I have added the RandomchaosContentPipelineManager to the project, this gives the model class the ability to use the bounding box data.
You will see in the example screen above that the target reticle is not in the center of the model, this is because the skullocc.x file has it's center at the bottom of the model. I have also noticed a bug with the targeting code, if you target a model then rotate the camera 180 degrees away, you get the target reticle behind you.
Again to ensure the download works, you will have to reference the Randomchaos3Engine.dll and the RandomchaosContentPipelineManager.dll, the later is done by right clicking the project name in the project explorer, select properties, select the Content Pipeline tab remove the current setting and replace with the path you have for the dll on your system.
RC3DEModelExample2.zip
If you have any comments or issues with this example, please post them here :)
Source Example 1 - Basic Model
Here is the first source code example, all it is is a simple model, skybox and camera implementation. This example comes with the model, two shaders, the skybox textures and the environment cubemap. The zip comes out at about 1.7M
The two shaders are:
A basic Texture shader, this is taken straight from the HM tutorial.
An Environment map shader, this is taken from the MS HLSL workshop.
The example shows the basics of loading shaders into the manager, creating a skybox and a model, passing shaders to these objects and adding them to the scene. It also has an implementation of getting an object back out of the scene. It also gives basic input, the mouse being used to rotate the camera, the arrow keys to translate the camera (move it left right and in and out of the scene) and the Escape key to exit.
If you want to create this project from scratch:
Open up a WindowsGame project, remove the Program.cs file as it is not needed, from the Game1.cs in the definition of the Game1 class remove the inherited class, you will need to add a static Main to the class. Reference the Randomchaos3DEngine.dll. Add the required using statements for the engine components you will use. Declare a variable of type RCGame. In the new static Main,wire up the engine events you want, add your objects to the scene and then run the game object.
To use the download example you may have to redirect the reference to the engine in the project to get it to work.
RC3DEModelExample1.zip
If you have any comments or issues with this example, please post them here :)
Sunday, July 22, 2007
Engine Design - Source
Here is a link to the source for this engine. It is just the source so there are no models, textures or shaders in this zip, just the engine and the content pipeline processor for models, this has extras in it for giving each mesh in a mesh a bounding box and basic animation (*.X only I think)
I will also put up a link in the right panel so you don't have to come back to this post and can access it off the links.
Just remember this engine is just an education tool for me and was not intended to be used as an actual full blown 3D engine, but I am sure you can get some use from it.
Over time, I am intending to put other source links up based on the objects in this blog. These examples will use the compiled Randomchaos3DEngine.dll and will have examples of the objects, like terrain, SM2 & SM3 fog, the ocean shader etc.
Enjoy...
Forgot to mention, the engines font class uses Nuclex Fonts so you will have to download this too, you can also find it in the source links. Legacy of pre refresh code
Saturday, July 21, 2007
What's Next??
Well, most of my work in XNA now is outside of the HM Engine so my posts from now on in will be more generic engine elements that you should be able to bolt into any XNA engine. I hope what I have posted has helped those of you that read this blog and not lead you down any dead ends or confused you. So what is next? Well I have a point sprite particle system that is now pushing about 10K of particles before I get my FPS below 65 so may well be next. I guess just keep coming back and see what is here, you can subscribe to the blog here if you would rather be informed of updates.
Engine Design - Fire
Right,
Here is the code for my fire, this fire effect is not to robust really, I need to do a little more work on it so I can have true volumetric fire, also I don't like the multi mesh approach I am using either so will probably play with the shader to get it to run on a single mesh. In short I am not happy with it yet, but I am posting it here so you can at least see what it does and it might give you some ideas of how to do your own. When I started out playing with this shader my knowledge of shaders was very limited, now I have a bit more experience I will more than likely improve on this, if I do I will post it her.
So, the code...
RCFire
So using this class in my engine for the screen shot above I set it up like this.
RCLayeredFire fire = new RCLayeredFire("Content/Models/Plane", "Content/Textures/flame", 6, "f");
fire.Position = new Vector3(0, -9f, 54);
fire.Scaling = new Vector3(3, 1, 5);
fire.AnimationSpeed = 0.1f;
fire.SetShader("FLA");
fire.FlameOffSet = .2f;
game.Scene.AddObject(fire, "f");
I have also found a bug (one of many) the mesh you are applying this to needs to have a texture with it or you will get a flame like this
As you can see there are a few bits of code commented out, this is because I am still working on this class, so little time, so much to do.
Flame.fx
Here is the shader (thanks again NVIDIA)
/*
Volumetric flame effect
based on Yury Uralsky's "Volumetric Fire"
http://www.cgshaders.org/shaders/show.php?id=39
$Id: //sw/devtools/SDK/9.5/SDK/MEDIA/HLSL/Flame.fx#2 $
This revolves a cross section of a flame image around the Y axis to
produce a cylindrical volume, and then perturbs the texture coordinates
with 4 octaves of animated 3D procedural noise to produce the flame effect.
Mod History: [Oriional shader from the NVIDIA 9.5 SDK]
23//03/2007 C. Humphrey charles.humphrey53@yahoo.co.uk http://www.randomchaos.co.uk
Modified so that the shader can be placed on an object that has
its position other than at 0,0,0 and made compatible with XNA.
*/
string XFile <string UIWidget="None";> = "slices_10y.x";
string description = "3D Flame";
// Added by C.Humphrey
float Index
<
string UIWidget = "slider";
float UIMin = 0.0;
float UIMax = 1.0;
float UIStep = 0.1;
>;
float Script : STANDARDSGLOBAL <
string UIWidget = "none";
string ScriptClass = "object";
string ScriptOrder = "standard";
string ScriptOutput = "color";
string Script = "Technique=ps20;";
> = 0.8;
float ticks : Time
<
string units = "sec";
string UIWidget="None";
>;
/************* TWEAKABLES **************/
float noiseFreq
<
string UIWidget = "slider";
float UIMin = 0.0; float UIMax = 1.0; float UIStep = 0.01;
> = .10;
float noiseStrength
<
string UIWidget = "slider";
float UIMin = 0.0; float UIMax = 5.0; float UIStep = 0.01;
> = 1.0;
float timeScale
<
string UIWidget = "slider";
string UIName = "Speed";
float UIMin = 0.0; float UIMax = 1.0; float UIStep = 0.01;
> = 1.0;
float3 noiseScale = { 1.0, 1.0, 1.0 };
float3 noiseAnim = { 0.0, -0.1, 0.0 };
float4 flameColor <string UIName = "flame color"; string UIWidget="Color";> = { 0.2, 0.2, 0.2, 1.0 };
float3 flameScale <string UIName = "flame scale";> = { 1.0, -1.0, 1.0 };
float3 flameTrans <string UIName = "flame offset";> = { 0.0, 0.0, 0.0 };
// Textures /////////////////
#define VOLUME_SIZE 32
texture noiseTexture
<
// string Name = "noiseL8_32x32x32.dds";
string ResourceType = "3D";
string function = "GenerateNoise1f";
float3 Dimensions = { VOLUME_SIZE, VOLUME_SIZE, VOLUME_SIZE};
>;
texture flameTexture
<
string ResourceName = "flame.png";
string ResourceType = "2D";
>;
// Vector-valued noise
float4 GenerateNoise4f(float3 Pos : POSITION) : COLOR
{
float4 c;
float3 P = Pos*VOLUME_SIZE;
c.r = noise(P);
c.g = noise(P + float3(11, 17, 23));
c.b = noise(P + float3(57, 93, 65));
c.a = noise(P + float3(77, 15, 111));
// return c*0.5+0.5;
return abs(c);
}
// Scalar noise
float GenerateNoise1f(float3 Pos : POSITION) : COLOR
{
float3 P = Pos*VOLUME_SIZE;
// return noise(P)*0.5+0.5;
return abs(noise(P));
}
// Tracked matricies
float4x4 wvp : WorldViewProjection <string UIWidget="WVP";>;
float4x4 world : World <string UIWidget="World";>;
//////////////////////////////
// Structures
struct appdata {
float3 Position : POSITION;
float4 UV : TEXCOORD0;
float4 Tangent : TANGENT0;
float4 Binormal : BINORMAL0;
float4 Normal : NORMAL;
};
struct vertexOutput {
float4 HPosition : POSITION;
float3 NoisePos : TEXCOORD0;
float3 FlamePos : TEXCOORD1;
float2 UV : TEXCOORD2;
};
// Vertex shader
vertexOutput flameVS(appdata IN,
uniform float4x4 WorldViewProj,
uniform float4x4 World,
uniform float3 noiseScale,
uniform float noiseFreq,
uniform float3 noiseAnim,
uniform float3 flameScale,
uniform float3 flameTrans,
uniform float timeScale
)
{
vertexOutput OUT;
float4 objPos = float4(IN.Position.x,IN.Position.y,IN.Position.z,1.0);
float3 worldPos = mul(objPos, World).xyz;
OUT.HPosition = mul(objPos, WorldViewProj);
float time = fmod(ticks, 10.0); // avoid large texcoords
OUT.NoisePos = worldPos*noiseScale*noiseFreq + time*timeScale*noiseAnim;
OUT.FlamePos = worldPos*flameScale + flameTrans;
// Mod by C.Humphrey so flame can be anywhere in the scene.
IN.Position.y += Index;
OUT.FlamePos.xz = IN.Position.xy;
OUT.FlamePos.y = IN.Position.z;
// End Mod
OUT.UV = IN.UV;
return OUT;
}
// Pixel shaders
half4 noise3D(uniform sampler3D NoiseMap, float3 P)
{
//return tex3D(NoiseMap, P)*2-1;
return tex3D(NoiseMap, P);
}
half4 turbulence4(uniform sampler3D NoiseMap, float3 P)
{
half4 sum = noise3D(NoiseMap, P)*0.5 +
        noise3D(NoiseMap, P*2)*0.25 +
        noise3D(NoiseMap, P*4)*0.125 +
noise3D(NoiseMap, P*8)*0.0625;
return sum;
}
half4 flamePS(vertexOutput IN,
uniform sampler3D NoiseMap,
uniform sampler2D FlameTex,
uniform half noiseStrength,
uniform half4 flameColor
) : COLOR
{
// return tex3D(NoiseMap,IN.NoisePos) * flameColor;
// return turbulence4(NoiseMap, IN.NoisePos) * flameColor;
half2 uv;
uv.x = length(IN.FlamePos.xz); // radial distance in XZ plane
uv.y = IN.FlamePos.y;
//uv.y += turbulence4(NoiseMap, IN.NoisePos) * noiseStrength;
uv.y += turbulence4(NoiseMap, IN.NoisePos) * noiseStrength / uv.x;
return tex2D(FlameTex, uv) * flameColor;
}
/****************************************************/
/********** SAMPLERS ********************************/
/****************************************************/
sampler3D noiseTextureSampler = sampler_state
{
Texture = <noiseTexture>;
MinFilter = Linear;
MagFilter = Linear;
MipFilter = Linear;
};
sampler2D flameTextureSampler = sampler_state
{
Texture = <flameTexture>;
MinFilter = Linear;
MagFilter = Linear;
MipFilter = Linear;
AddressU = Clamp;
AddressV = Clamp;
};
/****************************************************/
/********** TECHNIQUES ******************************/
/****************************************************/
technique ps20 <string Script = "Pass=p1d;";>
{
pass p1d <string Script = "Draw=geometry;";>
{
VertexShader = compile vs_1_1 flameVS(wvp, world,noiseScale, noiseFreq, noiseAnim, flameScale, flameTrans, timeScale);
/*
ZEnable = true;
ZWriteEnable = true;
CullMode = None;
AlphaBlendEnable = true;
BlendOp = Add;
SrcBlend = One;
DestBlend = One;
*/
PixelShader = compile ps_2_0 flamePS(noiseTextureSampler, flameTextureSampler, noiseStrength, flameColor);
}
}
/***************************** eof ***/
I suggest you don't use this code or shader as it is really not of much use in a 3D world. Once I have some spare time I will make this fully functional. I guess if nothing else you can have a play with the shader and learn from it...
Here is the code for my fire, this fire effect is not to robust really, I need to do a little more work on it so I can have true volumetric fire, also I don't like the multi mesh approach I am using either so will probably play with the shader to get it to run on a single mesh. In short I am not happy with it yet, but I am posting it here so you can at least see what it does and it might give you some ideas of how to do your own. When I started out playing with this shader my knowledge of shaders was very limited, now I have a bit more experience I will more than likely improve on this, if I do I will post it her.
So, the code...
RCFire
public class RCLayeredFire : RCObject, IRCChildRenderer, IRCLoadable
{
public bool Colapsed;
private RCModel[] flame;
private RCModel[] flame2;
private string flameModelAsset;
private string flameTextureAsset;
private int flameLayers;
private float animSpeed;
private float tick;
private float flameOffset;
private Vector3 camerasLastPosition = new Vector3(0,0,0);
private Texture2D flameTexture;
public float AnimationSpeed
{
get { return animSpeed; }
set { animSpeed = value; }
}
public float FlameOffSet
{
get { return flameOffset; }
set { flameOffset = value; }
}
public RCLayeredFire(string modelAsset,string textureAsset,int layers,string Name) : base(Name)
{
flameModelAsset = modelAsset;
flameTextureAsset = textureAsset;
flameLayers = layers;
flame = new RCModel[flameLayers];
flame2 = new RCModel[flameLayers];
base.Rotate(new Vector3(1, 0, 0), MathHelper.PiOver2);
for (int f = 0; f < flameLayers; f++)
{
flame[f] = new RCModel(flameModelAsset, "flame" + f.ToString());
flame[f].Rotation = myRotation;
flame2[f] = new RCModel(flameModelAsset, "flame" + f.ToString());
flame2[f].Rotation = myRotation;
flame2[f].Rotate(new Vector3(0, 0, 1), MathHelper.Pi);
}
}
public void LoadGraphicsContent(GraphicsDevice myDevice, ContentManager myLoader)
{
flameTexture = myLoader.Load<Texture2D>(flameTextureAsset);
for (int f = 0; f < flameLayers; f++)
{
flame[f].Rotation = myRotation;
// Now collapsed to a sigle position to ease rotation.
flame[f].Position = new Vector3(myPosition.X, myPosition.Y, myPosition.Z + (((float)f) / 10f));
//flame[f].Position = myPosition;
flame[f].SetShader(myShader);
flame[f].LoadGraphicsContent(myDevice, myLoader);
flame[f].UseBasicRender = false;
flame2[f].Rotation = myRotation;
flame2[f].Rotate(new Vector3(0, 0, 1), MathHelper.Pi);
flame2[f].Position = new Vector3(myPosition.X, myPosition.Y, myPosition.Z - (((float)f) / 10f));
flame2[f].SetShader(myShader);
flame2[f].LoadGraphicsContent(myDevice, myLoader);
}
}
public void RenderChildren(GraphicsDevice myDevice)
{
CullMode cull = myDevice.RenderState.CullMode;
bool depthBuffer = myDevice.RenderState.DepthBufferEnable;
bool Zwrite = myDevice.RenderState.DepthBufferWriteEnable;
bool AlphaEnable = myDevice.RenderState.AlphaBlendEnable;
BlendFunction blendOp = myDevice.RenderState.BlendFunction;
Blend srcBlend = myDevice.RenderState.SourceBlend;
Blend destblend = myDevice.RenderState.DestinationBlend;
//if (cull != CullMode.None)
// myDevice.RenderState.CullMode = CullMode.None;
if (depthBuffer != true)
myDevice.RenderState.DepthBufferEnable = true;
if (Zwrite != true)
myDevice.RenderState.DepthBufferWriteEnable = true;
if (AlphaEnable != true)
myDevice.RenderState.AlphaBlendEnable = true;
if (blendOp != BlendFunction.Add)
myDevice.RenderState.BlendFunction = BlendFunction.Add;
if (srcBlend != Blend.One)
myDevice.RenderState.SourceBlend = Blend.One;
if (destblend != Blend.One)
myDevice.RenderState.DestinationBlend = Blend.One;
if (RCCameraManager.ActiveCamera.Position != camerasLastPosition)
{
Vector3 tminusp = myPosition - RCCameraManager.ActiveCamera.Position;
tminusp.Normalize();
float angle = (float)Math.Acos(Vector3.Dot(tminusp, Vector3.Forward));
//this.Rotate(new Vector3(0, 0, 1), angle);
//this.Revolve(myPosition, new Vector3(0, 0, 1), angle);
camerasLastPosition = RCCameraManager.ActiveCamera.Position;
}
Effect effect = RCShaderManager.GetShader(myShader).Effect;
if (effect.Parameters["flameTexture"] != null)
effect.Parameters["flameTexture"].SetValue(flameTexture);
if (effect.Parameters["ticks"] != null)
effect.Parameters["ticks"].SetValue(tick += animSpeed);
for (int f = 0; f < flameLayers; f++)
{
flame[f].Rotation = myRotation;
flame[f].Scaling = myScaling;
//flame[f].AnimationSpeed = animSpeed;
flame2[f].Rotation = myRotation;
flame2[f].Rotate(new Vector3(0, 0, 1), MathHelper.Pi);
flame2[f].Scaling = myScaling;
flame2[f].AnimationSpeed = animSpeed;
if (effect.Parameters["Index"] != null)
effect.Parameters["Index"].SetValue(flameOffset + (float)Convert.ToDouble(f) / 10);
flame[f].Draw(myDevice);
//flame2[f].Draw(myDevice);
}
if (cull != myDevice.RenderState.CullMode)
myDevice.RenderState.CullMode = cull;
if (depthBuffer != myDevice.RenderState.DepthBufferEnable)
myDevice.RenderState.DepthBufferEnable = depthBuffer;
if (Zwrite != myDevice.RenderState.DepthBufferWriteEnable)
myDevice.RenderState.DepthBufferWriteEnable = Zwrite;
if (AlphaEnable != myDevice.RenderState.AlphaBlendEnable)
myDevice.RenderState.AlphaBlendEnable = AlphaEnable;
if (blendOp != myDevice.RenderState.BlendFunction)
myDevice.RenderState.BlendFunction = blendOp;
if (srcBlend != myDevice.RenderState.SourceBlend)
myDevice.RenderState.SourceBlend = srcBlend;
if (destblend != myDevice.RenderState.DestinationBlend)
myDevice.RenderState.DestinationBlend = destblend;
}
}
So using this class in my engine for the screen shot above I set it up like this.
RCLayeredFire fire = new RCLayeredFire("Content/Models/Plane", "Content/Textures/flame", 6, "f");
fire.Position = new Vector3(0, -9f, 54);
fire.Scaling = new Vector3(3, 1, 5);
fire.AnimationSpeed = 0.1f;
fire.SetShader("FLA");
fire.FlameOffSet = .2f;
game.Scene.AddObject(fire, "f");
I have also found a bug (one of many) the mesh you are applying this to needs to have a texture with it or you will get a flame like this
As you can see there are a few bits of code commented out, this is because I am still working on this class, so little time, so much to do.
Flame.fx
Here is the shader (thanks again NVIDIA)
/*
Volumetric flame effect
based on Yury Uralsky's "Volumetric Fire"
http://www.cgshaders.org/shaders/show.php?id=39
$Id: //sw/devtools/SDK/9.5/SDK/MEDIA/HLSL/Flame.fx#2 $
This revolves a cross section of a flame image around the Y axis to
produce a cylindrical volume, and then perturbs the texture coordinates
with 4 octaves of animated 3D procedural noise to produce the flame effect.
Mod History: [Oriional shader from the NVIDIA 9.5 SDK]
23//03/2007 C. Humphrey charles.humphrey53@yahoo.co.uk http://www.randomchaos.co.uk
Modified so that the shader can be placed on an object that has
its position other than at 0,0,0 and made compatible with XNA.
*/
string XFile <string UIWidget="None";> = "slices_10y.x";
string description = "3D Flame";
// Added by C.Humphrey
float Index
<
string UIWidget = "slider";
float UIMin = 0.0;
float UIMax = 1.0;
float UIStep = 0.1;
>;
float Script : STANDARDSGLOBAL <
string UIWidget = "none";
string ScriptClass = "object";
string ScriptOrder = "standard";
string ScriptOutput = "color";
string Script = "Technique=ps20;";
> = 0.8;
float ticks : Time
<
string units = "sec";
string UIWidget="None";
>;
/************* TWEAKABLES **************/
float noiseFreq
<
string UIWidget = "slider";
float UIMin = 0.0; float UIMax = 1.0; float UIStep = 0.01;
> = .10;
float noiseStrength
<
string UIWidget = "slider";
float UIMin = 0.0; float UIMax = 5.0; float UIStep = 0.01;
> = 1.0;
float timeScale
<
string UIWidget = "slider";
string UIName = "Speed";
float UIMin = 0.0; float UIMax = 1.0; float UIStep = 0.01;
> = 1.0;
float3 noiseScale = { 1.0, 1.0, 1.0 };
float3 noiseAnim = { 0.0, -0.1, 0.0 };
float4 flameColor <string UIName = "flame color"; string UIWidget="Color";> = { 0.2, 0.2, 0.2, 1.0 };
float3 flameScale <string UIName = "flame scale";> = { 1.0, -1.0, 1.0 };
float3 flameTrans <string UIName = "flame offset";> = { 0.0, 0.0, 0.0 };
// Textures /////////////////
#define VOLUME_SIZE 32
texture noiseTexture
<
// string Name = "noiseL8_32x32x32.dds";
string ResourceType = "3D";
string function = "GenerateNoise1f";
float3 Dimensions = { VOLUME_SIZE, VOLUME_SIZE, VOLUME_SIZE};
>;
texture flameTexture
<
string ResourceName = "flame.png";
string ResourceType = "2D";
>;
// Vector-valued noise
float4 GenerateNoise4f(float3 Pos : POSITION) : COLOR
{
float4 c;
float3 P = Pos*VOLUME_SIZE;
c.r = noise(P);
c.g = noise(P + float3(11, 17, 23));
c.b = noise(P + float3(57, 93, 65));
c.a = noise(P + float3(77, 15, 111));
// return c*0.5+0.5;
return abs(c);
}
// Scalar noise
float GenerateNoise1f(float3 Pos : POSITION) : COLOR
{
float3 P = Pos*VOLUME_SIZE;
// return noise(P)*0.5+0.5;
return abs(noise(P));
}
// Tracked matricies
float4x4 wvp : WorldViewProjection <string UIWidget="WVP";>;
float4x4 world : World <string UIWidget="World";>;
//////////////////////////////
// Structures
struct appdata {
float3 Position : POSITION;
float4 UV : TEXCOORD0;
float4 Tangent : TANGENT0;
float4 Binormal : BINORMAL0;
float4 Normal : NORMAL;
};
struct vertexOutput {
float4 HPosition : POSITION;
float3 NoisePos : TEXCOORD0;
float3 FlamePos : TEXCOORD1;
float2 UV : TEXCOORD2;
};
// Vertex shader
vertexOutput flameVS(appdata IN,
uniform float4x4 WorldViewProj,
uniform float4x4 World,
uniform float3 noiseScale,
uniform float noiseFreq,
uniform float3 noiseAnim,
uniform float3 flameScale,
uniform float3 flameTrans,
uniform float timeScale
)
{
vertexOutput OUT;
float4 objPos = float4(IN.Position.x,IN.Position.y,IN.Position.z,1.0);
float3 worldPos = mul(objPos, World).xyz;
OUT.HPosition = mul(objPos, WorldViewProj);
float time = fmod(ticks, 10.0); // avoid large texcoords
OUT.NoisePos = worldPos*noiseScale*noiseFreq + time*timeScale*noiseAnim;
OUT.FlamePos = worldPos*flameScale + flameTrans;
// Mod by C.Humphrey so flame can be anywhere in the scene.
IN.Position.y += Index;
OUT.FlamePos.xz = IN.Position.xy;
OUT.FlamePos.y = IN.Position.z;
// End Mod
OUT.UV = IN.UV;
return OUT;
}
// Pixel shaders
half4 noise3D(uniform sampler3D NoiseMap, float3 P)
{
//return tex3D(NoiseMap, P)*2-1;
return tex3D(NoiseMap, P);
}
half4 turbulence4(uniform sampler3D NoiseMap, float3 P)
{
half4 sum = noise3D(NoiseMap, P)*0.5 +
        noise3D(NoiseMap, P*2)*0.25 +
        noise3D(NoiseMap, P*4)*0.125 +
noise3D(NoiseMap, P*8)*0.0625;
return sum;
}
half4 flamePS(vertexOutput IN,
uniform sampler3D NoiseMap,
uniform sampler2D FlameTex,
uniform half noiseStrength,
uniform half4 flameColor
) : COLOR
{
// return tex3D(NoiseMap,IN.NoisePos) * flameColor;
// return turbulence4(NoiseMap, IN.NoisePos) * flameColor;
half2 uv;
uv.x = length(IN.FlamePos.xz); // radial distance in XZ plane
uv.y = IN.FlamePos.y;
//uv.y += turbulence4(NoiseMap, IN.NoisePos) * noiseStrength;
uv.y += turbulence4(NoiseMap, IN.NoisePos) * noiseStrength / uv.x;
return tex2D(FlameTex, uv) * flameColor;
}
/****************************************************/
/********** SAMPLERS ********************************/
/****************************************************/
sampler3D noiseTextureSampler = sampler_state
{
Texture = <noiseTexture>;
MinFilter = Linear;
MagFilter = Linear;
MipFilter = Linear;
};
sampler2D flameTextureSampler = sampler_state
{
Texture = <flameTexture>;
MinFilter = Linear;
MagFilter = Linear;
MipFilter = Linear;
AddressU = Clamp;
AddressV = Clamp;
};
/****************************************************/
/********** TECHNIQUES ******************************/
/****************************************************/
technique ps20 <string Script = "Pass=p1d;";>
{
pass p1d <string Script = "Draw=geometry;";>
{
VertexShader = compile vs_1_1 flameVS(wvp, world,noiseScale, noiseFreq, noiseAnim, flameScale, flameTrans, timeScale);
/*
ZEnable = true;
ZWriteEnable = true;
CullMode = None;
AlphaBlendEnable = true;
BlendOp = Add;
SrcBlend = One;
DestBlend = One;
*/
PixelShader = compile ps_2_0 flamePS(noiseTextureSampler, flameTextureSampler, noiseStrength, flameColor);
}
}
/***************************** eof ***/
I suggest you don't use this code or shader as it is really not of much use in a 3D world. Once I have some spare time I will make this fully functional. I guess if nothing else you can have a play with the shader and learn from it...
Tuesday, July 17, 2007
Shader Fog
Have found out how to do fog in the shader so this means that you can now have fog in your XBox 360 games as well as your Windows based games.
As usual it is a matter of adding the right semantic and setting the correct renderstate in the shader.
So, the code.
Shader Model 1.1 - 2
In your Shader's vertex return structure, add the following
float Fog : FOG;
In your vertex shader set the fog you require:
Output.Fog = 1.0f - ( length( Input.Position - EyePosition) / 50.0f);
Note: This is an example you can generate this how ever you need to.
Now all you have to do is set the render state for fog, so in the top of your pass add this
FOGENABLE = (3);
FOGCOLOR = (float4(.5,.5,.5,1));
Where 3 is Linear fog and float4(.5,.5,.5,1) would be the color gray.
Shader Model 3
To get fog working on SM 3 and/or the XBox 360 is a little different
Remove ALL state settings in the technique.
Swap the FOG simantic for a TEXCOORD.
As the FOGCOLOR state has been removed, you need to
calulate this in the shader per vertex lerp between the
calculated color and the fog color based on the FOG
TEXCOORD
For Example:
Out.Color = lerp(g_FogColor, color * ((In.Diffuse * g_MaterialDiffuseColor) * diffuse + g_MaterialAmbientColor), In.Fog);
Thanks to Leaf at XNA UK User Group and Jon Watte for your help with this I am sure this will help many others in there XNA development. Jon's shader also has the ability to specify the height of the fog and so giving a much richer fog effect, nice...
If you have any interest in the discussions we had then take a look here or the comments on this post.
Leaf has also put up an example of Jon's shader in action and you can find that here.
As usual it is a matter of adding the right semantic and setting the correct renderstate in the shader.
So, the code.
Shader Model 1.1 - 2
In your Shader's vertex return structure, add the following
float Fog : FOG;
In your vertex shader set the fog you require:
Output.Fog = 1.0f - ( length( Input.Position - EyePosition) / 50.0f);
Note: This is an example you can generate this how ever you need to.
Now all you have to do is set the render state for fog, so in the top of your pass add this
FOGENABLE = (3);
FOGCOLOR = (float4(.5,.5,.5,1));
Where 3 is Linear fog and float4(.5,.5,.5,1) would be the color gray.
Shader Model 3
To get fog working on SM 3 and/or the XBox 360 is a little different
calulate this in the shader per vertex lerp between the
calculated color and the fog color based on the FOG
TEXCOORD
For Example:
Out.Color = lerp(g_FogColor, color * ((In.Diffuse * g_MaterialDiffuseColor) * diffuse + g_MaterialAmbientColor), In.Fog);
Thanks to Leaf at XNA UK User Group and Jon Watte for your help with this I am sure this will help many others in there XNA development. Jon's shader also has the ability to specify the height of the fog and so giving a much richer fog effect, nice...
If you have any interest in the discussions we had then take a look here or the comments on this post.
Leaf has also put up an example of Jon's shader in action and you can find that here.
Subscribe to:
Posts (Atom)